


 I moved the upside down tops onto 6 stools each and hoisted the frames onto them. Centering, drilling and screwing down the frames went quickly. Unfortunately I did it late Sunday afternoon. There were many hours still left to assemble the tables completely. I had hoped to have the tables ready for class monday morning, but as it turned out, we used them without the lower shelves for the first few days.
 It took 2 trips in my small pickup to transport the frames to school.
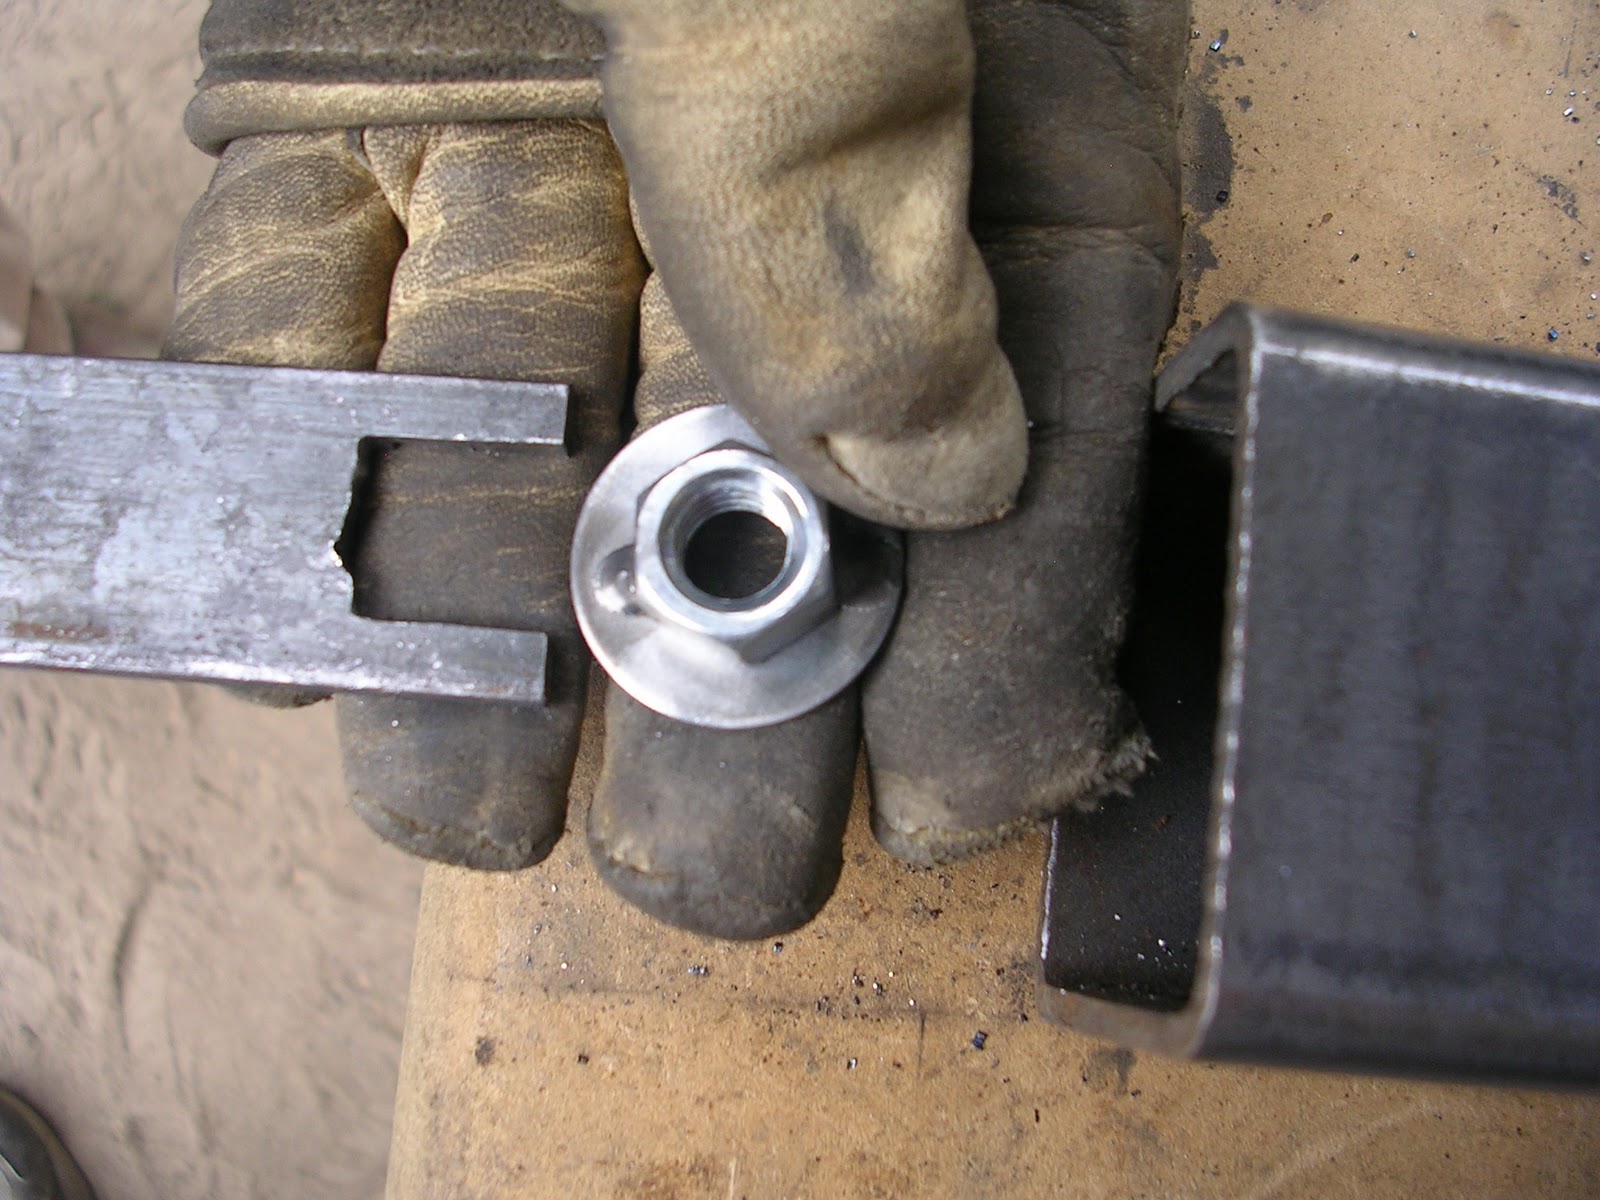 After drilling the over sized holes, I cut notches on opposite sides to accommodate welding the nut/washer units to the inside of the leg. I made a "wrench" out of 1" bar stock that would reach the distance to the shelf hole.
 Holding the nut/washer in place, I was able to use the bridge fixture I welded from 3/4" bar stock to draw the washer flush to the inside of the leg. Centering and tightening the bolt, enabled the nut/washer to stay securely in place while I tack welded the parts together. It took some experimenting with the heat and the technique in order to find the balance of penetration without melting the washer.

 Although I measured and marked precisely a slight variations in my welds made it necessary to use an adjustable ratchet strap to lessen the gap between outer frame and cross pieces.
  |
| Tack welding |
 |
| Squaring the frame |
 Then I welded the bottom flat seams of the mitered corners. This stablized the structure.

